Quantcast
Channel: Recent Discussions — shoryuken
Viewing all 45982 articles
Browse latest View live

When did you guys become comfortable with fighting games?

$
0
0
So a bit of background:

I started playing Street Fighter 4 back in 09' when the console versions of those games were released and played fairly consistently throughout that year. However, whenever I played online, I always felt that the matches were either a stomp, resulting in a win for me, or for my opponent, and every so often I would have a close match, that felt like I won because of dumb luck. The same went for whenever I played in arcades, I always felt that my opponents have always seemed way more comfortable with their characters than I was with mine. I eventually dropped off on playing Street Fighter almost entirely when I started college, but came back to play whenever time had allowed. But as of recently, I've started playing Street Fighter and fighting games again ever since SF5 was announced and want to get back in and actually be comfortable playing.

My question is when and why did you start feeling confident and comfortable with Street Fighter or any fighting games for that matter?

Super Smash Bros. General - Join our league! / Bayonaise poured all over our Corrin bread

$
0
0
Ok new game has been announced this shall be the thread for discussion and speculation. Let's try to keep it civil guys. Whether you think the game is a fighting game or not, the games are fun. I put the thread in GD to avoid as much BS as possible.


SRK's Smash League thread by our very own Colonel Gilgamesh
http://forums.shoryuken.com/discussion/193105/srk-smash-league-thread-starting-october-10th/p1

If you haven't signed up for SRK league yet get in contact with CG and tell him what you would like to participate in. Rules, times, and what to expect are in the OP of the thread.


IRC thread for match making
http://client01.chat.mibbit.com/?server=orion.psigenix.net&channel=#srk-smash

Alternate Link
https://chat.mibbit.com/?server=orion.psigenix.net&channel=#srk-smash

https://client01.chat.mibbit.com/?server=chronos.psigenix.net&channel=#srk-smash

https://client01.chat.mibbit.com/?server=aurora.psigenix.net&channel=#srk-smash

https://client01.chat.mibbit.com/?server=deep13.psigenix.net&channel=#srk-smash


Unlockable Character Requirements
Here's the list according to Smashpedia, so make of that what you will
Spoiler:
Character Special Unlock Matches number
Bowser Jr. Beat Classic Mode with Bowser on 7.0 difficulty or higher. 100
Dark Pit Beat Classic Mode 4 times. 50
Duck Hunt Beat Classic Mode 8 times. 110
Dr. Mario Beat Classic Mode as Mario. 60
Falco Beat Classic Mode for the first time. 20
Ganondorf Beat Classic Mode with Link or Zelda. 80
Jigglypuff Beat Classic Mode with a character using customizations. 120
Lucina Beat Classic Mode with Marth, Ike and Robin. 40
Mr. Game & Watch Beat Classic Mode 10 times. 90
Ness Beat Classic Mode 2 times. 10
R.O.B. Beat Classic Mode after obtaining 200 figures. 70
Wario Beat 100 Man Smash.


website:
http://www.smashbros.com/us/

Trailers
E3 2013 Trailer w/ Villager announcement
image

Megaman Announcement Trailer
image

Wii Fit Trainer Trailer
image

Sonic Trailer
image

Comet Observatory/Rosalina Trailer
image

Champion of the Ring Trailer/Lil Mac
image

Challenger From the Shadows/Charizard and Greninja Trailer


Goddess of Light/Palutena Trailer
image

Red, Blue, Yellow/ Pac-man Trailer
image

By Book, By Flame, by Crest of Flame/Lucina and Robin Reveal Trailer
image

Looks like we don't have a choice!/ Shulk Reveal Trailer
image

Amiibo First Set Trailer
image

Smash Bros. for Wii U - Launch Date Trailer


Smash Bros. Amiibo Trailer


Super Smash Bros. for Wii U Direct


The Future King/ Bowser Jr's Trailer
image

One Dog, One Bird, One Zapper/ Duck Hunt's Trailer
image

Mewtwo Strikes Back! Trailer
image

Lucas Comes Out of Nowhere! Trailer
image

Roy Seals the Deal! Trailer
image

Here Comes A New Challenger! Ryu Trailer
image

Super Mario Maker Stage Trailer
image

Cloud Storms into Battle!/ Cloud Trailer
image

Other
Sakurai Smash Bros. Direct
image

April 2014 Smash Bros. Direct
image

Mii Fighters Suit Up for Wave 2
image

Mii Fighters Suit Up for Wave 4
image


E3 2014 info
Spoiler:
Invitational Tournament Trailer Info
image

Takes place Tues, June 10th from 4-6:30pm. It will be streamed via Twitch.


Sakurai's 90 minute conference will be at 10 to 11:30 PM ET on June 10th
http://www.polygon.com/2014/5/16/5724506/nintendo-e3-2014-smash-bros-3ds-game-developer-discussion


E3 2014 Build Character Movesets
Spoiler:
Sonic
image

Zelda
image

Yoshi
image

Wii Fit Trainer
image

Villager
image

Toon Link
image

Shiek
image

Samus
image

Pit
image

Pikachu
image

Megaman
image

Marth
image

Mario
image

Luigi
image

Lil Mac
image

Kirby
image

Greninja
image

Fox
image

Donkey Kong
image

Bowser
image

Example in how the ledge mechanics work
image

Final Smashes shown as of E3 2014
image


Let the games begin...

Republican Party presidential candidates, 2016

Democratic Party presidential candidates, 2016

Karin General Discussion Thread. Elegant offense for a more civilized age.

$
0
0
Today's Changelog (Sep. 23)

Adding more detailed info on normal moves, including images. (in progress)
Minor changes to special moves section.

News

Karin revealed at TGS 2015 (SRK)
Gameplay breakdown from Haunts (Capcom-Unity)

Official Media

Reveal trailer:
Spoiler:
image
Official art:
Spoiler:
12001011_10153721605622147_5838274233787575002_o.jpg
Moveset card:
Spoiler:
sfv-karin-movelist.jpg
Twitter character card:
Spoiler:
11990484_10153724671392147_764449657309849712_n.png?oh=a0dee000ac6468d4ad291308967279b8&oe=566AEB53
Vine character card:
Spoiler:

If this is too small on your browser, click the V.
Random screenshots:
Spoiler:
12038685_10153721604222147_587933412381389847_o.jpg
12017602_10153721635197147_633057580665090218_o.jpg
12027580_10153721604277147_5496327583950893580_n.jpg?oh=c0d998cbc59491dd45b40dbf2378cf9e&oe=56AB7543

Video Footage

--TGS build--
VesperArcade moveset breakdown:
Spoiler:
image
Character walkthrough with Nuki:
Spoiler:
image
TGS stream footage:
Spoiler:
image
image
image
image
image
image
image
image
Developer vs. Mago exhibition:
Spoiler:
image
Gamespot footage:
Spoiler:
image
image
IGN footage:
Spoiler:
image
image
Other sources:
Spoiler:
image

Moveset Info/Speculation

Normal Moves:
Spoiler:
Will be added to in the future. In the meantime, here's a summary.

Light attacks so far have not been seen to lead into any combos. No cancels, or links outside of counterhit, have been found in videos. Presumably, they will only be useful to push the opponent away on defense, or to set up tick throws or other mixup.

Known cancelable normals: s.MP, s.HP, cr.MP, cr.MK, cr.HP.
Anti-airs: s.HP, cr.HP.
Crush counter: s.HK.
Command normal: f+MK (overhead.)

Known links: s.MP > cr.MP, cr.MP > cr.MK, s.HP xx V-trigger > s.HP.
Special Moves:
Spoiler:
QCF+K - Sappo. Command dash that either be used for mixup afterward or canceled into either of two followups.
  • P - Tenko. Angled upwards strike with one arm, launching the opponent and allowing followups. Using this immediately after Sappo changes the properties of the move in unknown ways.
  • Down+P - Orochi. AKA "shoulder." Karin rams into the opponent with her back turned.

QCB+K - Mujin Kyaku. AKA "upkicks." Current speculation is that this move has automatic followups depending on which kick button you used.
  • LK has no followup and is probably safe on block.
  • MK continues the upkicks into something that resembles Karin's overhead f+MK. It does not fully combo on hit. Properties are unknown, but it may be useful as a frametrap, a high-low mixup, or as part of juggles.
  • HK has a longer continuation that fully combos on hit, and is probably your choice meterless combo ender outside of V-trigger, likely unsafe on block.

QCB+P - Ressen Ha. Arcing rainbow palm that hits overhead and knocks down on hit. Has two potential followups:
  • Down+K - Senha Kusabi. Sliding kick that hits low.
  • Up+K - Hopping grab that works against standing opponents. May be usable to avoid some common punishes/low attacks.

QCF+P - Guren Ken. AKA "rekka." Only available during V-trigger, a chain of variable attacks that can be used as a hitconfirm, or for general pressure or mixup. See below for details.
Guren Ken followups:
Spoiler:
It seems like the above movelist card is not thorough in listing all of her possible options at each step during rekka. For the moment I will assume that it's accurate and make the corrections when they've been contradicted by video evidence.

Step 1:
  • QCF+P - Guren Ken. The initial rekka hit. Hits twice.
Step 2:
  • K - Guren Kyoho. Ends the rekka by backdashing to safety, used to bait counterattacks. Drains a lot of V-gauge. (Input is speculation.)
  • P - Guren Hosho. A palm strike that ends the rekka. Can combo into CA.
  • Up+P - Guren Senha. Arcing rainbow palm that hits overhead, and allows a link afterwards.
  • Up+K - Guren Resshu. Hopping grab that works against standing opponents. May be usable to avoid some common punishes/low attacks. (Listed as step 3, but seen in step 2 during videos.)
  • Down+K - Guren Kusabi. Sliding kick that hits low. (Listed as step 3, but seen in step 2 during videos.)
  • Down+P - Guren Chochu. Single elbow strike that continues the rekka. Leads to step 3.
Step 3:
  • Down+P - Guren Hochu. Karin crosses behind the opponent and strikes their back. Hits crossup. (Input is speculated.)
  • Up+K - Guren Resshu. Hopping grab that works against standing opponents. May be usable to avoid some common punishes/low attacks.
  • Down+K - Guren Kusabi. Sliding kick that hits low.


This post will be regularly updated with links to new content/information once it's available.

Regarding new releases and tourneys.

$
0
0
So I don't know how exactly how they handle this in other games, but since we're going to periodically have new characters, how is that going to work? Mortal Kombat has a grace period between release and character use in tourneys doesn't it? Hopefully we can do that too.

Blizzard Overwatch

Valentine's day thoughts. Enter your own at your risk.

$
0
0
"Once again Valentine's day looms near.

As I stand here, looking down at the various people scrambling about, What I see is people in a mad scramble to find a perfect gift. The annual quest to exceed the standard set the year before. Men who have become obsessed with the want, no, I say, the obligation to prove their love to that one special woman on this day. An obligation that sees them bring forth every last ounce of their will and strength to hopefully stand triumpant and gain the right to claim the highest honor of love from that one woman they hold above all others. As I see this, one singular thought enters my mind. A thought that is becomes more truthful with each passing year. It is this thought, this truth that while immaterial, becomes more and more solid with each rotation of the year to this day.


..................Batman, you were right. You were always right. Make cash, wear strange clothes, stick to the shadows, avoid getting trapped in a relationship, and most importantly, fuck what others think. "

Happy V-Day my fellows.

-Starhammer-

SFV PS3 Stick support I found proof MAYBE

$
0
0
Hi all,

If you check this video image which is quite recent you see Combofiend playing on what seems to be a PS3 stick, I couldn't find any picture of a PS4 that looks like this, what do you guys think?

The Flash TV Series Thread

$
0
0
http://en.wikipedia.org/wiki/The_Flash_(2014_TV_series)

Cast:
Grant Gustin as Barry Allen/The Flash...........he has already appeared on Arrow.
Jesse L. Martin as Det. West (Iris West's father and Barry's father figure)
Rick Cosnett as Eddie Thawne/Professor Zoom
Danielle Panabaker as Caitlin Snow/Killer Frost
Candice Patton as Iris West
Carlos Valdes as Francisco Roman/Vibe
Tom Cavanaugh as S.T.A.R. Labs CEO Harrison Wells
John Wesley Shipp (Yes.........the same JWS that played The Flash in the 90's TV series) as ??????

It looks like the Arrow spinoff is rounding out well...........

ds4 need help !!

$
0
0
i am a new here in shoryuken.com and i want some helps for my ds4 pcb i whant to connect it to my hori arcade stick soulcalibur 5 ps3 .

first : it is possible ?
second : how can i make this works?
pls help me guys coz un just destroyed my controller ps4 trying to conect him to my stick :anguished:

Who The Hell Is Sean? aka the Laura Matsuda Thread v.2

$
0
0
Since she's now been officially announcedsomeone at Sony ended up leaking her again, this time with her official trailer to boot. Here's a brand new thread for Laura.
sfv-laura-trailer-750.png?resize=640%2C300
http://shoryuken.com/2015/10/07/street-fighter-vs-laura-shocks-the-competition-in-official-reveal-trailer/

Now the previous thread was locked because a bunch of trolls started causing fights over her skin color. This, despite the fact that actual Brazilian members stated that her skin color was accurate.

As such, there will be a ZERO TOLERANCE policy on this thread regarding bringing that up once again.

Newbie guide: Venom PS4 / Mayflash V2 Full Sanwa Mod with Octo for £116 [UK Pricing]

$
0
0
Hi all,

A lot of information I've seen out there is useful, but sometimes it's quite technical, so I thought I'd make this beginners guide for a full Sanwa modded PS4 arcade stick on the cheap.

Background:
I've been playing fighters on and off for a while, but SFV re-ignited that passion. Shame about the beta. Anyway, I decided to rock an Arcade stick and the Venom was very cheap in comparison to the others. I'm getting used to it but found the square gate horrible, and the buttons were even worse. The stick was quite stiff but I kind of liked it! Either way, I have been reading up various posts and threads and people have been raving about this value setup, but I couldn't find a comprehensive guide (particularly for a noob like myself). So I decided to put this together, please let me know if it's useful and if any corrections are needed. As PresidentCamacho mentions below, the Venom is the same as the Mayflash V2, so the same guide should apply.


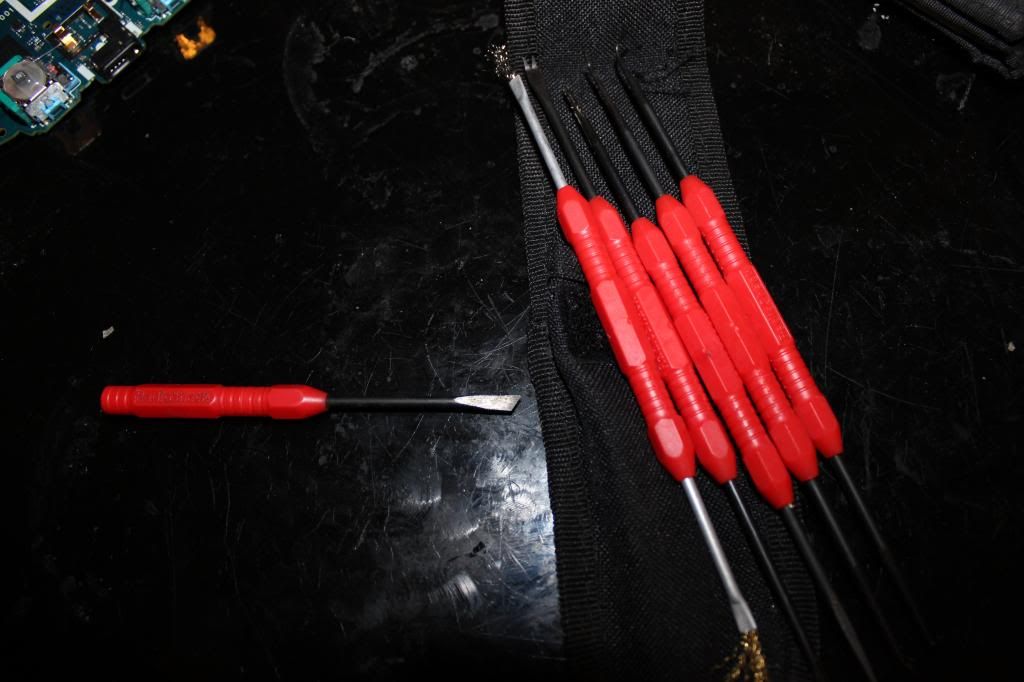
What you'll need (and pricing):

How to:
1. Open up your original stick and have a play with it so you can notice the difference afterwards. After all, it's what you prefer and not what everyone else says you should be using
DSC_0110.jpg


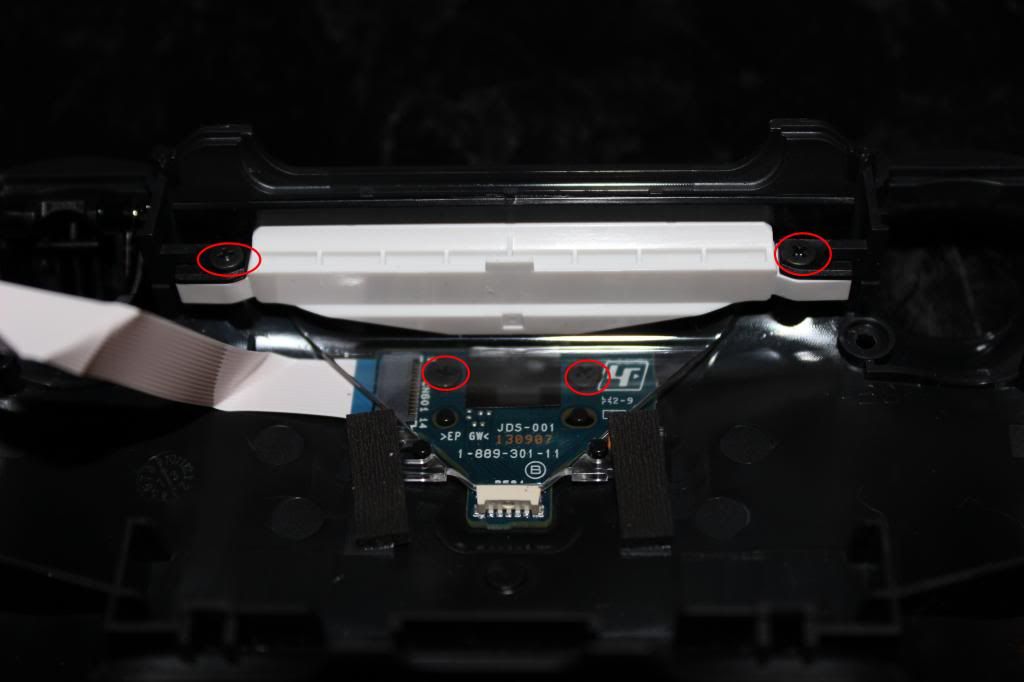
2. Flip it over and open the 6 screws on the back and take the backplate off to reveal (image taken part way through but effectively there's a bunch of cables and buttons and stuff):
DSC_0085.jpg


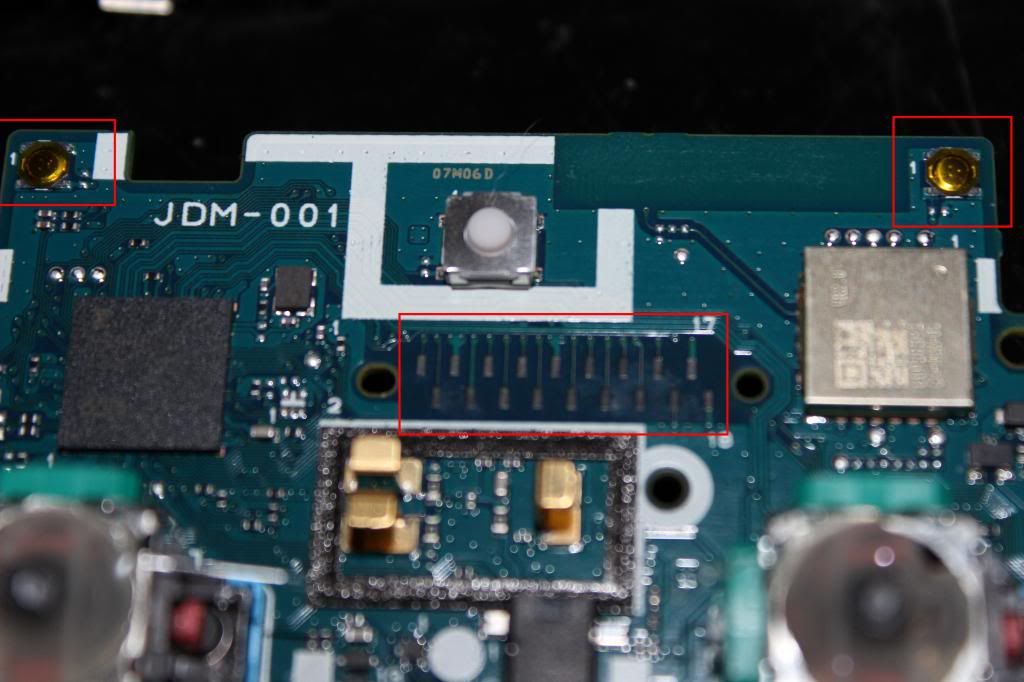
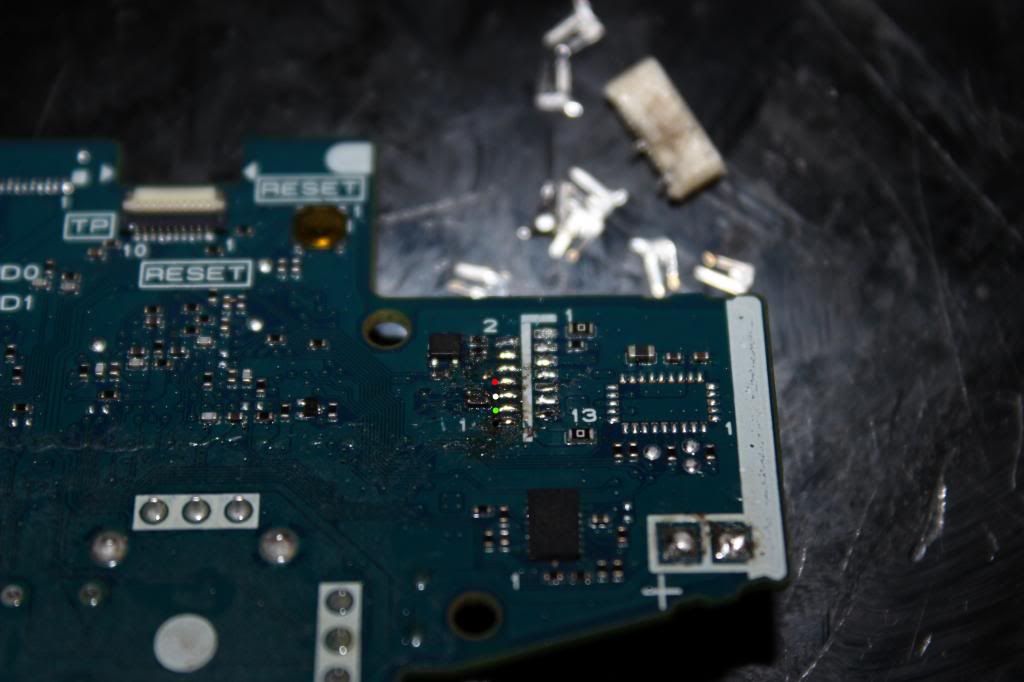
3. You will notice there are 6 buttons and corresponding colored wires going into them. To save time, I put a mark next to the ones that had duplicate colors and mapped them so I knew where they went (if you don't do this you can refer to the small board which they come out from). Here's a closeup of some helpful coloring :smile: (picture taken post assembly, but the principal is the same):
DSC_0108.jpg


4. Start taking all the wires from the buttons out, don't pinch all the way at the root, but a bit above:
DSC_0086.jpg


5. Remove the ball top by putting a screwdriver under the stick and rotate the ball top (image taken post assembly, but the principal is the same):
DSC_0106.jpg


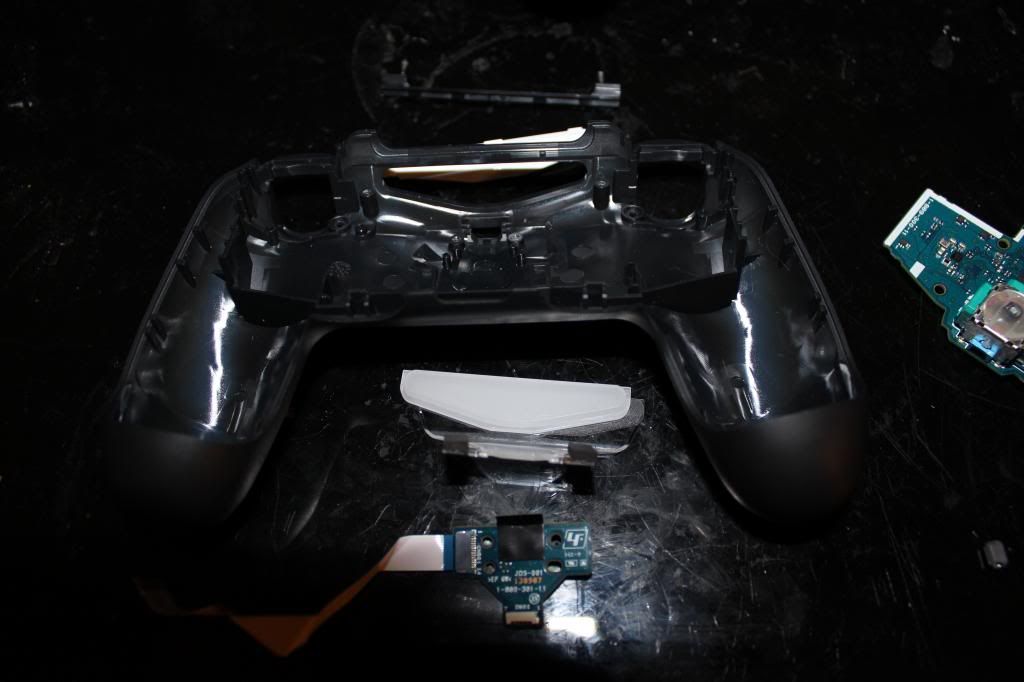
6. & 7. Now remove the four screws holding the actual stick and lift it, then remove the 4 cables from the board it's connected to (these can just be pulled out). Cut the cabletie CAREFULLY so the cables aren't bound (in this picture the cabletie is not cut) and lift it out.
DSC_0090.jpg
DSC_0094.jpg


8. OPTIONAL: Take your JLF 8YT and pop out your gate (there are 4 clamps, just put minimal pressure lifting it out and pop each clamp gently:
DSC_0091.jpg
DSC_0092.jpg


9. OPTIONAL: Replace the square gate with your GT Y Octagonal gate (again, there are 4 clamps, just put minimal pressure and gently pop each on):
DSC_0093.jpg


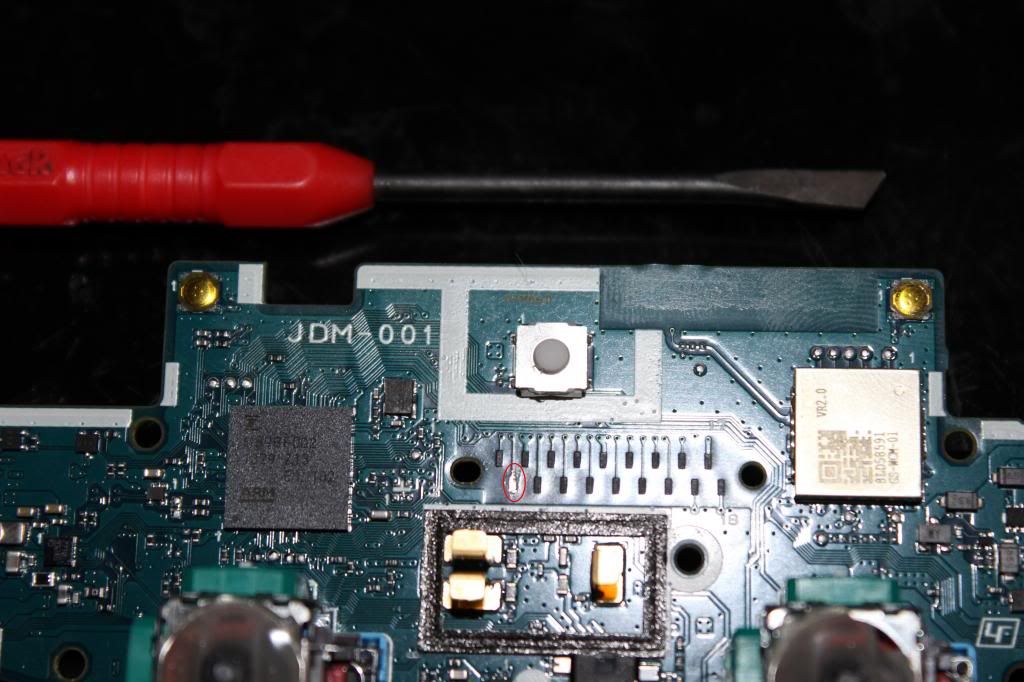
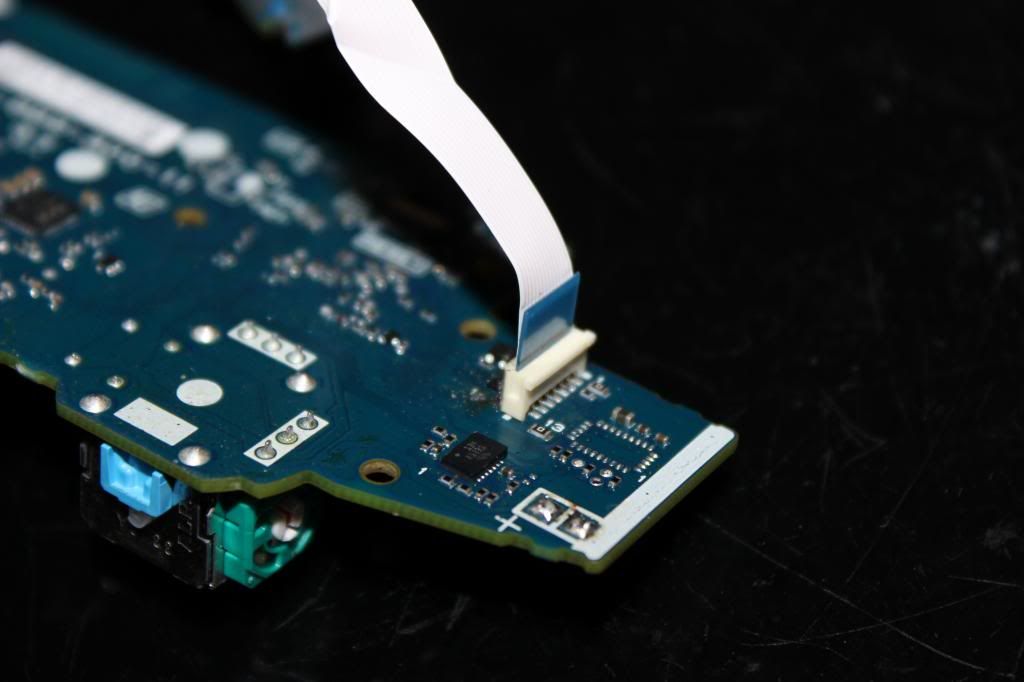
10 & 11. If you have two washers, put one washer between the stick and the inside of the case, then screw the 4 screws back in place which hold the stick, ensuring the 5 pins are facing INWARDS. Then connect the 5 pin JST cable, however, ensure the teeth of the CABLE is FACING you when you put it on, otherwise only one direction will work. I was paranoid and I connected the cable then tested it out with the case option to ensure UP wasn't DOWN etc :smile: ...and I suggest you do the same if you're not certain. Once you've connected the JST cable, then connect the other end to the board, there's only one slot for it and one way it can go in. Don't be too forceful but do make sure it's all the way in (in my picture it's right above the bit that says MF002V). Do not connect the ball top yet!
DSC_0106.jpg
DSC_0099.jpg


12. Unless you've already done so, pop out all the stock buttons, you will notice they have two 'clamps' which extrude under the plexi and metal. The easiest way to do this is to push one side first, then the other. If you plan on re-using these buttons, please be careful as these clamps are fragile and can't be removed and inserted too many times as far as I understand it (picture post assemble but principal is the same):
DSC_0103.jpg


13. Once they're all popped out, you can lift the plexi where the USB cable resides:
DSC_0087.jpg
DSC_0088.jpg


14. Feel free to replace with your own art or get someone else to do it. Here's my placeholder, but I'm not entirely happy with the design so I'm going to change it (which would explain why my stick is naked!):
kYPnNaP.jpg
Yep, I know *that* Ken isn't from SFV :smiley:

Remember that the plexi has the button scheme on it, so there's no need to duplicate that in your art. This post has the template. If you want my template let me know.


15. Put the plexi back on (it's magnetic, fancy!) then insert all the buttons to your liking:
DSC_0104.jpg


16. If you had two washers (see point 10.) put the other washer on, then screw the ball top back on the stick, and use a screw driver to gently tighten (this MAY not be necessary):
DSC_0089.jpg
DSC_0106.jpg


17. Remember the little diagram we did (perhaps it was just me...) - well this comes in handy now that you need to reconnect all the cables back. It doesn't matter which PIN you connect the respective PAIR of cables to:
DSC_0085.jpg
DSC_0108.jpg


18. Voila!
DSC_0107.jpg

19. Test it out in your favourite fighter
DSC_0111.jpg

I'm aware there are similar posts but I couldn't find one that quickly explained the steps for this specific arcade stick, and with the female to female JST cable, it was super easy! I hope this has been useful.

Peace,
SineTwo

Metal Gear SOLID Thread: Snake? SNAAAAKE!!!!

$
0
0
So we dont clutter up the rising thread with this stuff...Didn't see another MGS thread but if there is feel free to delete/merge

MGS: Ground Zeroes trailer
image

The Phantom Pain (MGS5?) trailer
image

TPP interview with fox engine confirmation?
image

people discussing that Joakim Mogren might be CGI. LMFAO

Ultra Street Fighter 4 General

$
0
0
Just announced. Get hype.

Ultra Street Fighter 4 will include 5 new characters (4 of which are ported from Street Fighter x Tekken: Rolento, Elena, Poison, and Hugo. The 5th is current unknown but is said to have never been in a street fighter game before. NOTE IT IS NOT ASURA OR BBA MEGAMAN

It will include 6 additional stages said to be Pitstop 109, Mad Gear Hideout, Cosmic Elevator, Blast Furnace, Half Pipe, and Jurassic Era Research Facility. All from SFxT.

A complete rebalance to the entire cast based off of fan suggestions

It will cost 15$ for a digital version which you can upgrade from EITHER Super or Arcade Edition for the same price. The full retail version will cost $40 and include all of the DLC costumes at no extra charge. The game will be released on PS3/Xbox360/PC early 2014. Capcom is hoping for a simultaneous release on all 3 platforms or to at very much keep the PC closer to the PS3/Xbox360 release date than ever before. Pre-ordering will get you special pre-order exclusive costumes designed by Udon for the 5 new characters.

There will be location tests and special events in both Japan and USA for players to play early builds and give feedback that may impact the balance changes before they become final.

NOTE: USF4 may in fact use Steamworks instead of GFWL!

Art's Hobbies - DIY Acrylic Cases.

$
0
0
Cases are now available on my site: Art's Hobbies

!!! 3/27/11 NEW Updates regarding Diamond Joints and Hitbox! Jump to post #702


LOTS OF INFO AND TONS OF PICS INCOMING!

***** PLEASE CHECK THE 2ND POST OF THIS THREAD FOR Q&A and FUTURE UPDATES . READ THAT FIRST IF YOU HAVE QUESTIONS IN CASE YOUR QUESTION IS ALREADY ANSWERED! I WILL NO LONGER ANSWER QUESTIONS THAT ARE ALREADY ADDRESSED IN THAT POST. Please just take a moment to read the info...


These cases will be available on my website, Welcome to Art's Hobbies, in early September.
These are Cases ONLY. Not full fightsticks. Joysticks, Buttons, PCBs are not included

Hey guys! I would like to reveal a project I've been working on for the past few months, under the radar.

Some time late last year, parabellum asked:

"May I humbly suggest some additional services which you may wish to consider offering?

Simple plexi cases: If you offered a 'bolt it together yourself' case made from laser cut plexi, you could supply these with the screws, etc....and I think there would potentially be great demand for this. If the price could be kept down to around $50-$60, I think it would be a winner."


That suggestion has stuck with me and I haven't stopped thinking about it. Since working with plexiglass (acrylic) has its limitations, it took me some time to come up with a solution. Many months and lots of trial and errors later, finally... I believe I've found the solution and I bring you a completely modifiable DIY full acrylic case!

This case was designed with you, the modder, in mind with the ability to customize pretty much every aspect of the case... to make it your own! So lets take all these pieces...

pieces.jpg

And turn them into this! (Might be a tad hard to make out all the details at first, being that everything's clear and there's a lot of reflection in the pics. But the details will be more prominent as you scroll further down.

case1.jpg

case2.jpg

case5.jpg

Lets look at one of the unique things to personalize your case. The Name plates!

case3.jpg

case4.jpg

The Name Plates act as extra support for the case, and it's a great place to cut your name/handle/short phrase to really identify your case. These are "Cut" through the acrylic, not "etched".

Now it's a little hard to see, with everything being clear, but on the back of the case there is a PCB section which has a couple of PCB holders and a wire hook to help with PCB placement and organization.

pcb1.jpg

These holders can be adjusted/removed to fit your needs. While initially designed to fit the cthulhu boards, they can still hold hacked pads and other pcb's by a simple ziptie method or whatever you come up with. You don't have to use them, but they are there to help you out if you want them.

pcb2.jpg

Here are some pics with a JLF and some buttons in place .

casebut1.jpg

casebut2.jpg

casebut3.jpg

casebut4.jpg


The pics above only show a glimpse of what can be done. Let me try to get into more details and options with more pics =).

Lets say you want to replace the front panel now because you prefer a Neutrik Adapter rather than a cord opening. No problem, lets take a front panel with a Neutrik space...

replace1.jpg

now unscrew the four screws holding the front panel of the case...

replace2.jpg

place the buttons and Neutrik adapter on the new panel and screw back in...

replace3.jpg

and Done!

replace4.jpg


Or decided you no longer want buttons on the side panel? No prob, swap it.

replace6.jpg

Yep, it's that easy to change your mind.


Now lets look at some color options. Here's a Dark Blue theme.

Specs:
Top: Clear; Sega Blast City 6 Button
Top & Bottom Borders = Transparent Dark Blue
Name Plate & PCB Plate = Transparent Dark Blue
Front Panel = Clear; S/S Buttons and Neutrik
Back Panel = Clear
Left & Right side panel = Transparent Dark Blue
Bottom = Clear
JLF Mount = Transparent Dark Blue

blue1.jpg

The colors help distinguish some parts a little better, for instance the border design.

blue2.jpg

blue3.jpg

blue4.jpg

Lets try an Iron Man theme

Specs:
Top: Clear; Sega Blast City 6 Button
Top & Bottom Borders = Transparent Red
Name Plate & PCB plate = Transparent Red
Front Panel = Fluorescent Orange; S/S buttons and Neutrik
Back Panel = Fluorescent Orange
Left & Right side panel = Transparent Red
Bottom = Clear
Bottom Thin Plexi with 2 Artworks (one facing each side)
JLF Mount = Transparent Red

This shows Artwork placed on the bottom but facing top side to add a little background to future wiring. A thin bottom plexi is used to sandwich the artwork in place

im1.jpg

im2.jpg

The Fluorescent Orange reflected the flash so the front couldn't be seen. Below is without flash (ugly color turnout) but at least shows the Name Plate. Under regular light, you can see through to notice the name plate.

im2b.jpg

Flipping the case around, there's another artwork. Basically I place two artworks between a thin bottom plexi.

im3.jpg

Here are some pics without the artwork so the design is more clear.

im4.jpg

im5.jpg


Here's some closeups of the Name Plates in these examples:

nameplate1.jpg

nameplate2.jpg

View of the case frames. Showing Borders, Name Plate, and PCB Plate which forms the skeletal structure of the case.

frames1.jpg

frames2.jpg

Those are just some basic color combinations. But basically, the color combinations and setups are up to your imagination? and what color/material stock I can get, lol.


Oh and top artwork you ask? But of course! Optional thin top plexi's will be available.

art1.jpg

art2.jpg

The artwork is cut a little smaller than the full top of the case. This gives a natural border, particularly for dark and opaque top colors. For clear tops, this makes the artwork look like it's floating in a frame.

art3.jpg

Gotta show the popular Chun Li artwork by Stanley Lau.

chun1.jpg

chun2.jpg

chun3.jpg


Taking this even one step further, how about thin plexi options all around the case which essentially allows you to turn the entire case into swappable artwork.


Lets say I wanted to give my entire case a carbon fiber look with a high res print of a carbon fiber pattern. Then cut the image for the top and all four sides. Sandwich all pieces to all sides and...

carbon1.jpg

carbon2.jpg

carbon3.jpg

Obviously a full artwork case swap is all up to your imagination. I plan to make one with a large cast of either Marvel or SSF4 all around the sides.


Alright, almost done. Sorry if I'm tiring you out with all the pics, lol.

Here's my working, complete prototype from about a month ago. A few minor changes were made since these pics. (Fluorescent Orange Border, Name Plate, PCB Plate and Left/Right Sides. Using a salvaged 360 TE PCB)


proto1.jpg

proto2.jpg

proto3.jpg

Here's probably a better closeup of the PCB holders and wire hook in action. Just using zip ties to keep them in place.

proto4.jpg


And last, but not least, here are what I call "Side Decors". Here's a sample of Acrylic shapes that can be screwed on to the side panels to further express yourself.

sidedecor1.jpg


They will come in pairs so you can apply them corner to corner, or a piece per side. Or use two sets and have them corner to corner on opposite sides.

sidedecor2.jpg

Apply them anywhere on the sides of the case, where room permits. Obviously if the area has buttons, these won't fit that area.

sidedecor3.jpg

Other Side Decor colors and shapes will be made available.


Finally, those are all the pics I have so far =). I will post more pics of other various colors when I have time. (I want to take pics of the lighter colors, and when I restock Fluorescent Blue. Also with opaque colors, and etching samples).

Here are some more highlights and details:

* Size: L 13 1/2" x W 8 1/2" x H 2 1/4". Height is about 2 1/2" with feet.

* Weight: Just case is 2.35 lbs; With JLF, Buttons and TE PCB is about 3.5 lbs (will obviously vary)
* Everything is put together by screws and what I call "Diamond Joints". There is absolutely no "gluing" or acrylic bonding agents needed.

* Because no permanent bonding is used, all parts can be easily swapped and changed to fit your style. Also, if by some unfortunate accident a part of the case gets damaged, you can simply replace the damaged part with a new one rather than worrying about replacing the entire case.

* Your personal Name Plate, cut with a short text of your choice. Not etched, actual cut through the acrylic.

* Top and Bottom panels are extended out past the rectangular outline of the case with rounded corners. This prevents issues with sharp corners.

* Popular button configurations will be available (ie: Vewlix, Blast City, T5, Midway, Capcom, etc).

* Various button options for the left/right side panels, as well as front panel including neutrik setup.

* Most parts will have etching options.

* Thin plexi and Artwork options available for top, bottom and sides.

* All pieces (except for diamond joints) are made with 1/8" acrylic so more colors can be available. (Majority of colors are more readily available in 1/8" thickness)

* PCB holders and wire loops to help with PCB and Wire organization.


So that's it for now. Hope you guys are excited as I am =). I will showcase more on etching and other color combos when I get a chance. I will be working on an instructional video to show how everything is put together. Hopefully I'll get that up within a week or two.

I have also asked a few experienced modders to be testers and when they get the first cases they can share their personal experiences. But from my personal experience, and one other's, the results have been great!

Thanks again for everyone's support =). And shout out to parabellum, where ever you are buddy, thanks for giving me a challenge ;).

Got Questions? Look at the bottom post first.

display1.jpg

"At ease, loo-suh!" The Alex SFV Thread

$
0
0
Ok guys, we know alex is coming, he was always considered mid to low tier in the sf3 series, what would you like to see from him in V?

I will update this thread when my future main is revealed in his full glory!

The Relationship/Dating Thread: We will argue over your issue like we're your parents...even yell.

$
0
0
:smokin:THE RELATIONSHIP/DATING THREAD RULES AN GUIDELINES:smokin:
New Thread for a New Year
1) This thread if for opinions and knowledge of women/men in general. Relationships, dating, situations, issues, sex..etc. I ask that everyone keep it REAL and not DUMB.:cool:


2) Don't knock anyones opinion nor take it for full regard unless the majority agrees. Otherwise take it an mold it to your liking.:chat:


3) Make sure to look through the thread for situations that may be similar to yours. If you can't a member shall just point out a post that has the answer you are looking for.:wow:


4) We have lady members, so respect their opinions and views please.:tup:


5) IF you feel uncomfortable expressing it within here, I am willing to answer it through PM.:shy:


6) Ignorant answers will be deleted as well as disses toward those that may have not walked your path.:nunchuck:
7) Concerned about your health....please resort to www.WebMD.com for further help rather than srk.:wtf:

8) Please no "Post a Pic" reply. It will be deleted. ALONG WITH THAT--> sending pics of someone without their knowledge can lead to a ban... so think before doing so.:annoy:


9) If you want one member to answer your question, please state his or her name in the beginning. (ie hey ______insert trustworthy member...):pray:


10) Relationship questions should be given enough detail for those willing to help to understand (your age, length of time together, and issues at hand aka your an her fault) :sweat:

11) This is NOT a journal. Any day to day posting will be deleted and you will be warned.:zzz:

12) Trolling will get you an infraction and possible ban. So watch yourself.

13) THOSE THAT ARE DATING/IN A RELATIONSHIP with some that post on this site... please keep any "at home issues" off the site. I NOR any mod can help you other than infract/ban the both of you.

14) Remember we have a younger generation on this site now and folk viewing from all over. SEXUAL topics/issues please try to keep serious.


Good luck. I will try to answer as many as I can and hope srk's finest will help also.:tup:


Thanks!!
Koop:woot:

Blade & Soul - Your Weapon Is In Another Chest

$
0
0
The other thread has been dead for 5 years, so.....

Pick from seven classes and battle foes with a fast-paced action-combat system where timing, counters, and combos are the focus. Listen well, although the way of battle is easy to learn, becoming a true master takes practice. Challenge foes in PvP duels, or explore with friends in a variety of Dungeons and hone your combat skills to match your legacy.
http://www.bladeandsoul.com/en/

Launch Trailer:
image

Classes:
image
image
image
image
image
image
image

Tips / Reviews / Guides:
image
image
image

Dual Shock 4 PadHack Thread - aka you should padhack the hfc4 pad instead.

$
0
0
UPDATE: Just padhack a hori fighting commander 4 instead.


So you want to add PS4 functionality to your arcade stick? Well too bad. Just wait until there is a third party pcb that is cheap and easy to wire up. Maybe we'll get lucky and there will be a firmware update to any of the
custom ps3 pcb's that are out in the market. Oh, you don't want to wait? You really want it now? Well the only option right now is to padhack a Dual Shock 4 controller. Luckily for us the pcb is common ground. Unluckily for us
the pcb is a pain in the ass to wire up and is quite unforgiving if you mess up. You thought the Xbox One pad hack was hard? This pad hack shits all over it. You accidentally burn off or rip off a contact pad on the ds4 and
you've just wasted $60. The only option after that is to find a via that traces to the contact pad that you've just destroyed. They are not easy to find nor solder to.

So if you think you have the skills or are looking for a challenge you have been warned. Don't hold me responsible if you damage your DS4.

With that being said, let the padhack begin! We will start out with preparing the ds4 pcb.

To begin opening up the DS4 you must unscrew the four screws on the back of the pad.
IMG_0336_zps442ab332.jpg

You'll need to use a size #0, #00, or #000 Phillips head screwdriver. If you don't own one then I suggest buying a Husky precision screwdriver set.
IMG_0337_zps65fe8af9.jpg

You'll need to use a little force to pull apart the shell, but don't pull the shells too far apart too fast. There is a ribbon cable connecting the usb jack to the ds4 pcb. Pull the ribbon cable out first. Then unplug the

lithium ion battery pack. Then cut off the rumble motor wires.
IMG_0338_zps823d7882.jpg

Circled is one more screw that holds the pcb to the shell.
IMG_0339_zpsced0a56e.jpg

Be careful as you lift the pcb out. There is still one more ribbon cable left that needs to be unplugged. It might be a bit difficult to unplug with your finger so using tweezers or forceps will make things easier.
IMG_0340_zpsde1f7a4d.jpg

If you have very tight space limitations inside your case you'll probably will want to desolder the analog jacks and neutralize the axis with 10k ohm resistors. However, for most applications just cutting the stubs and gluing
the stick in place will suffice.
IMG_0341_zpsb1f0d7c5.jpg

If you want to use the micro usb jack, and I suggest you do, then you'll need to unscrew four screws that hold it in place. The top two have to be removed first. Then the led light thingy can be removed to gain access to the
bottom two screws.
IMG_0342_zps8f1dea6e.jpg

Remove and set aside the micro usb jack.
IMG_0343_zpsf0d6dec8.jpg

This is where you'll be wiring up the joystick and buttons to. Looks fun doesn't it?
IMG_0345_zps3e268abe.jpg

To gain access to the copper contact pads the carbon residue has to be scraped off.
IMG_0346_zpse7c0faea.jpg

I have a pick set that I got from radio shack that I use to scrape off the carbon pads. The one on the left I accidentally broke in half from trying to pry something off. I suggest not using these picks to pry stuff off.
IMG_0348_zpsb592d658.jpg

Here's the pinout for the 18 contact pads and which need to be scraped. It is the same for all the model revisions 001, 011, and 020.
1-(Don't worry about me)
2-L1 (needs inverting)
3-10k ohm to pad4
4-L2
5-right
6-up
7-left
8-down
9-ground (Don't worry about scraping me either)
10-home
11-x
12-circle
13-triangle
14-square
15-(Don't worry about me too)
16-R1 (needs inverting)
17-10k ohm to pad18
18-R2
IMG_0349_zps2f5337b0.jpg

Tin the contact pads. Use flux as necessary.
IMG_0350_zps46ac45f6.jpg

Tin the two very small contact spots in the rectangle for Select.
IMG_0351_zps5e8432e9.jpg

Tin the two very small contact spots in the rectangle for Start.
IMG_0352_zps4cd67d9f.jpg

Look at this. This is the ribbon connector for the usb jack. See how simple this is? Want to see how hard your life will be if you don't use this? Just check out the next picture.
IMG_0354_zps133a474f.jpg

These are the four pins you will have to solder to if you don't want to use the micro usb jack. Pretty small and cramped there.
Note this pin out is for the JDM-001 model and the pictures will reference to that model.
8- Vcc
10- D-
12- D+
14- GND

Pin out for the 011 and 020:
7- Vcc
8- Vcc
9- Gnd
10- D-
11- D+
12- Gnd

IMG_0353_zpsdb05b9bc.jpg

Of coarse removing the ribbon connector will make soldering to the contact pads much easier. This route might be necessary if you are limited in case space. In which case you'd have to remove the battery jack too.
IMG_0355_zps79565b7c.jpg


Now the DS4 pcb is all prepared to begin the wiring!
Viewing all 45982 articles
Browse latest View live